A Monthly Newsletter for Draft Kegerator and Homebrew Aficionados
|
 Fundamentals of Kegerator Conversion
There's
nothing quite as satisfying as serving yourself and your friends an ice
cold mug of beer from your own kegerator. Why pay twice as much for
cans or bottles when you can enjoy even better beer for a lot less
money? We carry everything you need to convert a low cost fridge into a
home draft or homebrew kegerator in a matter of hours! No more buying
expensive bottles, no more hand-pumping the keg, and no more spoiled
keg beer the next day. Our kegerator kits are ideal for home bars,
patios or custom installations.
KegKits offers a great selection of kegerator kits to fit any installation or budget. Order the finest kegerator conversion kits
on the market today! Kegerator conversion kits are the simplest and
most economical way to convert a new or spare refrigerator into an
impressive home draft beer system or homebrew kegerator. You can even convert a freezer into a kegerator by adding a temperature control unit.
We offer the best selection of Kegerator Conversion Kits on the
internet. These kits have new, commercial grade components--the same
quality you would expect at your favorite tavern. All of our kits are
easy to install with our step-by-step instructions and great for a Saturday afternoon project. Kegerator Conversion Kits make great gifts for the do-it-yourself beer connoisseur.
The types of Kegerator Conversion Kits we carry include:
Draft Beer Kegerator Kits
Pony Tap Draft Beer Kits
Draft Beer Kits with Door Mount Faucets
Draft Beer Kits with Towers
Home Brew Kegerator Kits
Pony Tap Style Kits
Beer Faucet Style Kits
Beer Tower Style Kits
Regardless of the type of kegerator you're building, the conversion elements are the same:
CO2 Tank
– Most often a 5# tank, but sometimes a 20# tank. A 20# CO2 tank will
be the most economical to fill or exchange but a 5# CO2 tank will be
much easier to handle and can often be placed inside the kegerator with
the kegs.
CO2 Regulator
– The cheapest regulators will have a single gauge that will display
only your regulator setting. Even though a 2 gauge regulator will cost
a little more, it is worth the extra cost because the second gauge (the
tank gauge) will tell you when your CO2 tank is close to empty.
CO2 lines
– Most often a single line or a line with a tee for multiple kegs. Most
of the time the line is ¼” ID. Some more extravagant multi-keg
conversions run their CO2 through a manifold with an individual shutoff
and check valve for each keg.
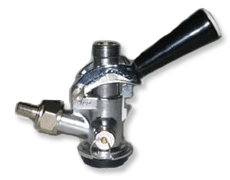
CO2 disconnects / keg couplers
– Disconnects attach the CO2 lines to the Cornelius tanks (kegs) while
the CO2 line is attached to the side of a draft keg coupler. CO2
disconnects and keg couplers incorporate their own internal shutoff
valves that turn off the CO2 when disconnected from a keg.
Homebrew - Cornelius (or Corny) keg
– There are 2 choices here, pin lock (Coke) or ball lock (General
Beverage or Pepsi). The difference between the two systems are how the
disconnects attach to the keg. With pin lock, a collar is twisted to
lock the disconnects onto the keg. With ball lock, a collar is lifted
and then dropped down to lock the disconnects onto the keg. Both
systems are available new or used.
Draft - 1/6 barrel, 1/2 barrel or 1/4 barrel
- The tall, slender 1/6 barrel kegs are the easiest to handle, followed
by the 1/4 barrel and then finally the 1/2 barrel keg. Also, a multi
keg kegerator is easier to manage with 1/6 barrel kegs because they can
be stacked side by side.
Liquid disconnects / keg couplers
– Disconnects attach the beer lines to the Cornelius tanks (kegs) while
keg couplers dispense beer straight through the center. And just like
the CO2 disconnects, the liquid disconnects also incorporate their own
internal shutoff valves that turn off the beer when disconnected from a
keg. Quality keg couplers incorporate a check valve to prevent back
flow when uncoupling a keg.
Beer line –
should always be 3/16” ID and should be heavy beer line or BIB tubing.
3/16” tubing is small enough to make the beer slow down on the way to
the tap, helping to prevent foaming. The ideal length for reducing
foaming while still maintaining a decent pour speed is usually 5-6 feet.
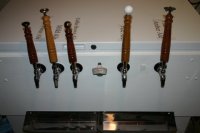
Beer faucets – Can be a beer tower, commercial style beer faucets or low cost pony taps.
|
| |
 Fun Beer Facts
1. Monks brewing beer in the Middle Ages were allowed to drink five quarts of beer a day.
2. The hobby of collecting beer mats or coasters is refered to as "tegestology."
3. Bavaria still defines beer as a staple food.
|
| |
 CO2 Regulators 101
The CO2 regulator
is the heart of your system and is used to step your CO2 tank pressure
from 500 - 1200 PSI down to a much more reasonable 5 - 12 PSI. CO2
regulators come in many different varieties and configurations and the
one you need depends on your setup and future plans.
Welding Regulators
Most
welding regulators are designed to flow high volumes of CO2 for
shielding gas and they will not regulate down to the pressures you need
for your kegerator. These regulators will not work for a homebrew
kegerator.
Pre-Set Regulators
Pre-set
regulators come with the pressure pre-set and no gauge to monitor the
CO2 pressure. These regulators can't be fine-tuned without special
tools and won't work for a homebrew kegerator.
High Pressure CO2 Regulators
These
regulators typically come with a 0 - 160 PSI low pressure gauge, which
can be hard to read in the 5 - 12 PSI range. But they work well and are
usually a great value.
Low Pressure CO2 Regulators
These
regulators typically come with a 0 - 60 PSI or 0 - 50 PSI low pressure
gauge and are easy to read since the gauge is usually marked every 1 or
2 PSI. These types of regulators are usually purchased for home as well
as commercial keg setups.
Single Gauge vs. Double Gauge CO2 Regulators
Single
gauge regulators are cheaper, but they do not have a gauge to display
your CO2 tank pressure. Double gauge regulators are really a better
value because you can tell from the second gauge (the tank gauge) when
you are about to run out of CO2.
Primary and Secondary CO2 Regulators
A
primary regulator will connect directly to your CO2 tank while a
secondary regulator needs the initial pressure dropped by a primary
regulator. If you are setting up a simple 1 or 2 keg system then you
only need a primary regulator. But if you are interested in serving
several different beers, a system composed of a primary and several
secondary regulators is worth looking at. With this system, you set
your primary regulator to somewhere between 50 and 150 PSI. Then you
connect your secondary regulators to the primary regulator and set each
to its own individual pressure. If you only need 2 pressures then a 2
pressure regulator set is a better solution.
Draft Beer Regulators vs. Homebrew Beer Regulators
The
difference between a draft beer regulator and a homebrew beer regulator
is not the regulator itself. The difference is the CO2 out fitting.
Draft systems almost always use a 3/8" or 5/16" gas line which means
you will need a CO2 regulator with a 3/8" barb fitting. Both 3/8" and
5/16" gas lines will fit a 3/8" barb fitting. Homebrew systems are
usually based on soda kegs and almost always use 1/4" gas line and a
CO2 regulator with a 1/4" barb fitting. A third option is a regulator
with a 1/4" flare (threaded) fitting which can be adapted to either
standard with a simple fitting.
2 pressure CO2 Regulators
2
pressure regulators are really just 2 primary regulators connected
together. The regulators are 100% independent of each other and each
can be set to its own pressure. More than 2 regulators can be connected
together but 3 or more becomes unstable and could tip over your CO2
bottle. With a 2 pressure regulator, you can run one draft keg and one
homebrew keg or you can run one pressure for serving and another higher
pressure just for fast carbonating your next homebrew keg of beer.
|
| |
 Signs You Are Drunk
1. Vampires and mosquitos catch a buzz after biting you.
2. You lose arguments with inanimate objects.
3. Your job is interfering with your beer drinking.
|
| |
 Adding More Taps to Your Kegerator
Sometimes, just one kind of delicious homebrew or draft beer simply isn't enough! Everyone loves a little variety. If you have a single tap kegerator, it's quite easy to upgrade and add more taps.
If
you're ready to turn your single tap into a kegerator that serves two
or more beers at a time, the main factor you need to consider is the
size of the refrigerator unit. All of the kegs and beer lines need to
stay cold, so it's the unit size, not the number of faucets, that
determines how many different beers you're able to dispense.
Another factor you'll need to consider is your CO2 regulator system.
You'll need a system comprised of primary and several secondary
regulators if you're going to be serving several types of beer and/or
soda. In this system, the secondary regulators are connected to the
primary regulator and each is set to its own pressure.
If you only need 2 pressures then a 2 pressure regulator set is a better solution.
2 pressure regulators, as discussed in "CO2 Regulators 101" (above),
are simply 2 primary regulators connected together. With this system,
you can run one draft keg and one homebrew keg, or set one pressure for
serving and one for fast carbonating.
|
| |
 Norm's Monthly Quote (from "Cheers")
Sam: "Beer, Norm?"
Norm: "Have I gotten that predictable? Good."
|
| |
 Next Month's Issue
Basic Brewing Theory
Fun Beer Facts
How Not to Brew
Signs You Are Drunk
Draft Beer Temperature
Norm's Monthly Quote
Until next time, drink in good health!
|
| |
|
|